|
|
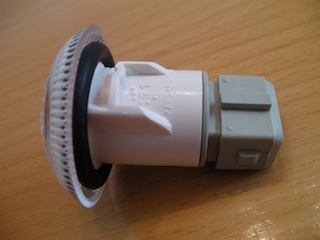
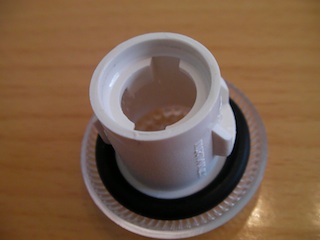
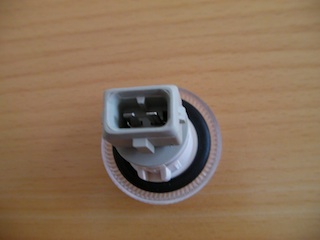
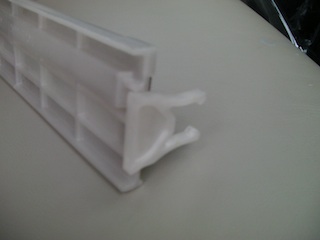
For illustration purposes: This is what a complete side repeater assembly looks like in total and in parts (excluding the chunky electrical connection)
If the glass of your side repeater is broken as shown here
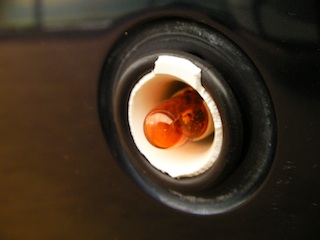
or you simply want to replace a blown bulb inside your side repeater, follow these steps:
Push the side repeater a bit while turning clockwise around 30 degrees,

then pull out the assembly as much as possible.
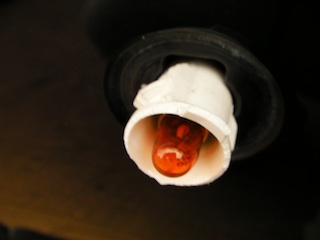
Unfortunately (due to not so Great British engineering) you are unable to pull out the assembly in total.
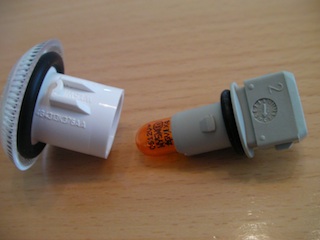
The power plug is too big to pass the hole. You can only get out the white part and if you don't pull gently, it will be drawn back in again.
For those with guts (for those that hesitate see * below): use e.g. pliers to keep the grey part in position while twisting the white part counter clockwise until they come apart. There's less friction caused by the little O-ring than expected. Now you can pull the defective bulb and replace it. Take care that the grey part doesn't slip back through the opening! If the glass is broken, you need to replace the white assembly. Mount all in reverse order. This sounds easier than it is. The hardest part is to mount the white on the grey part while assuring that the now hard to reach grey part stays in position. Somewhat tricky but doable and capable of raising your adrenaline level. It took me around 10 minutes to figure it out the very first time.
If you're a wimp or lost the assembly in the wing, you have to follow the official route and dissemble the wheel arch liner to reach into the wing and unclip the power plug. Therefore you have to lift the car and unmount the wheel first, then loosen around one and a half dozen Tx30 screws before you can take the arch liner out. The whole procedure will take much longer...
For those in between, you can use some thin twine or yarn at that (*) position above to form a sling and tighten it where the grey part meets the white one (when assembled) to prevent the grey stuff slipping back into the wing or getting it out again when lost. Then follow the description above.
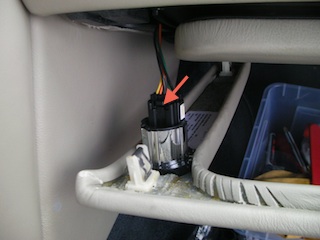
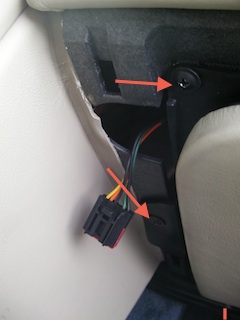
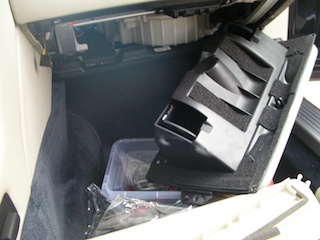
You need to remove the glove box since the pollen filter is located right behind it. First start by removing the outer trim (the one with the opener button in it). Simply pull gently and it will come off. Remove the electrical connector while the glove box is still closed. There's a small clip to be pressed to release the connector (see arrow).
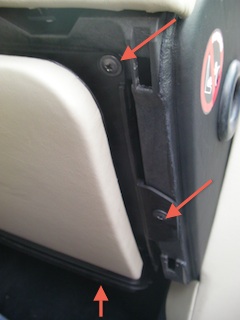
Next remove the glove box: There are two screws at each side of the glove box: One in the upper corner, the other 2/3 down the side
and three ones at the bottom of the glovebox. Those three are hard to find first time. So their position is shown here
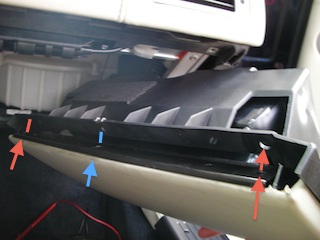
at the already pulled out glove box (also turned upside down) for illustration purposes, but we aren't there yet.
The outer two of them (red arrows) have to be removed, the middle one (blue arrow) can stay in place. This middle screw holds glove box door and compartment together. If you remove that screw as well, it doesn't do any harm. Just remember to fix it in the end, as well.
Once the screws are removed, reconnect the the opening button and open the glove box. Have Key in position II for that. Open glove box which will come away. Take care for the cord at the side. Now pull out the compartment (glove box rear plus glove box door) and turn to the right side as shown.
Now you shall see a white cover clipped onto the white heater assembly.
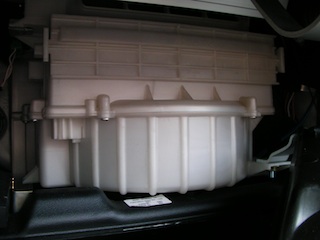
It's just clipped on at the right and the left upper end of the heater assembly (red arrows). Unclip the cover with care as the clips look somewhat fragile.
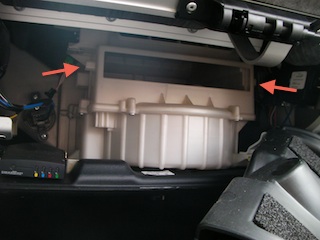
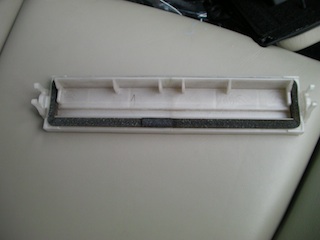
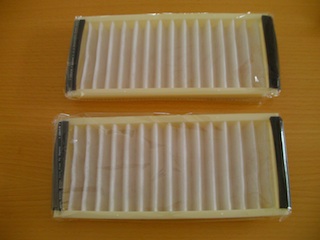
Remove the filters that become visible,

replace them with new ones. You might want to use a felt tip marker to record replacement date and milage on the new filter cartridges.
You're half way there. Now rebuild in reverse order.
Use an OBD scanner (i use a scandevil) to read the error messages. Connector location is on the driver's side at the lower end of the lower dashboard panel in the footwell next to the center console. There are two OBD connectors. One for engine (inner one), the other one for the body (outer one). Fortunately there's the footwell light nearby so you can see rather good there. Protocol is CAN 11/500.
I suggest recording the error messages and mileage. Only reset the error messages if you know what you are doing!
This can be found on the iPod page.
To be added as soon as installed.
To drain the oil first remove the front undertray.
Please really do so!
Although you can drain the sump without removing the undertray, it's really difficult to avoid oil spinning when changing the oil filter; especially when you do it the first time. Even more pronounced when you are changing the filter in a LHD car. The filter is so badly positioned behind the steering assmbly that you most likely WILL spill some oil, which then resides on top of the undertray and really creates a mess and can not be removed without replacing removing the (now very dirty) undertray. So best to remove the clean undertray first.
Now remove the sump plug. Drain the oil into a suitable
container. Remember that the engine holds approximately 11 liters of oil! Avoid engine oil draining onto steering rack/rubber hoses. Install a new sump plug with a torque of 23-27 Nm.
BTW: Check the length of your oil dip stick, since it was the wrong length in earlier cars resulting in too low oil levels. The correct part number is 4G4E-6750-AC and can easily be found on the backside of the Min-Max level indicator on the tip of the dip stick.
Renew the oil filter: Remove the air intake from the throttle body. Remove the throttle body. As a precaution to minimize oil spillage, cover the oil filter with a plastic bag. Now physically remove the oil filter. Clean any excess oil from around and below the oil filter.
Install a new shiny white oil filter with the AM Logo by smearing the lip of the oil filter with clean engine oil before installing the new filter to the engine block. Hand tighten the oil filter. Reinstall throttle body and air intake pipe. Ensure excess engine oil is removed before installing the undertray. Reinstall the front undertray.
Refill the oil: AM recommends synthetic Mobil 1 SEA0W40. The required amounts can be found in your owner's manual.
How to reset the service interval message can be found in the hints section.